During my engagement with Phillip Morris International, we have been developing a program that allows users to diagnose the issues they encounter with IQOS devices quickly. The initial idea was to make the process as user-friendly as possible, and I believe we have been pretty successful in achieving that goal. I’m delighted to present it here.
My team was responsible for maintaining the application functionality, updating content, and testing the quality. As a QA in the team, my primary response was to test the quality of the software.
Brief Description of the Device Diagnostic Application
In the vaping industry, like in any other industry that works with electronic devices, there is a huge need to address user questions, feedback, and issues. So, it’s necessary to answer them as soon as possible. Since the vast vaping market is enormous, the support team can’t answer all user responses simultaneously, which is time-consuming.
That’s why it was necessary to come up with answers to as many issues as possible that users may encounter during device use. Also, it was essential to feed this information into a system that could automate the whole thing by navigating the users to get them the proper answers.
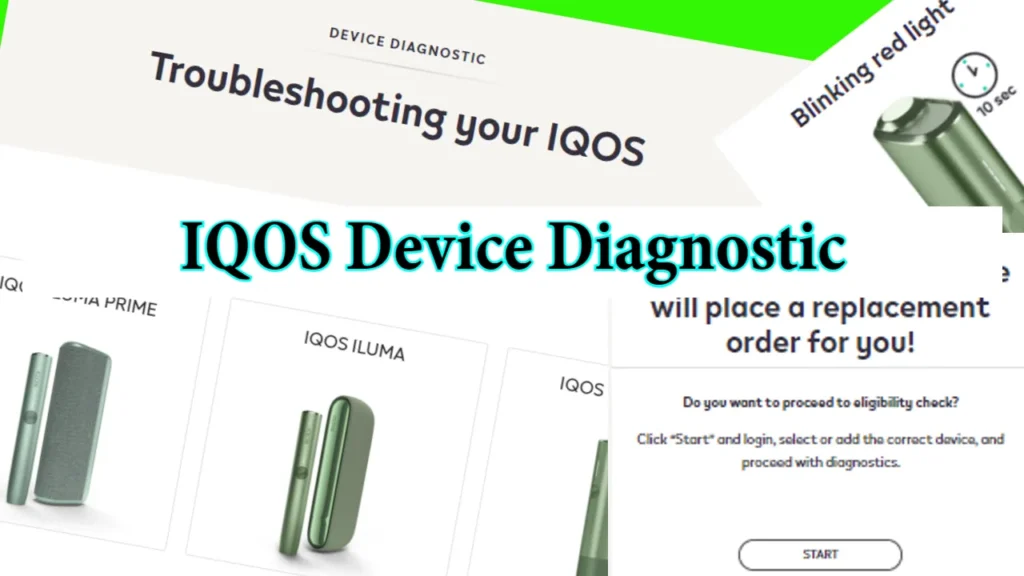
That’s how the company came up with the idea of creating the IQOS Device Diagnostic program. Internally, we call it “QURE.” You may navigate to the IQOS Device Diagnostic here: https://www.iqos.com/gb/en/qure.html?gr=false. We have configured this application for plenty of markets, but the GB one is probably the best presentation.
The IQOS Device Diagnostic process consists of a few steps. Here is how we could present it more structurally:
Step 1
Step 1.5
Step 2
Sub-Step 1
Sub-Step 2
Sub-Step 3
Ending Step
Each step is updated with engaging images and gifs so that users can easily relate their issues to those, as well as copies that describe the problems and solutions, simply and concisely.
Step 1
As soon as the user reaches the Device Diagnostic landing page, they are on Step 1 of this process.
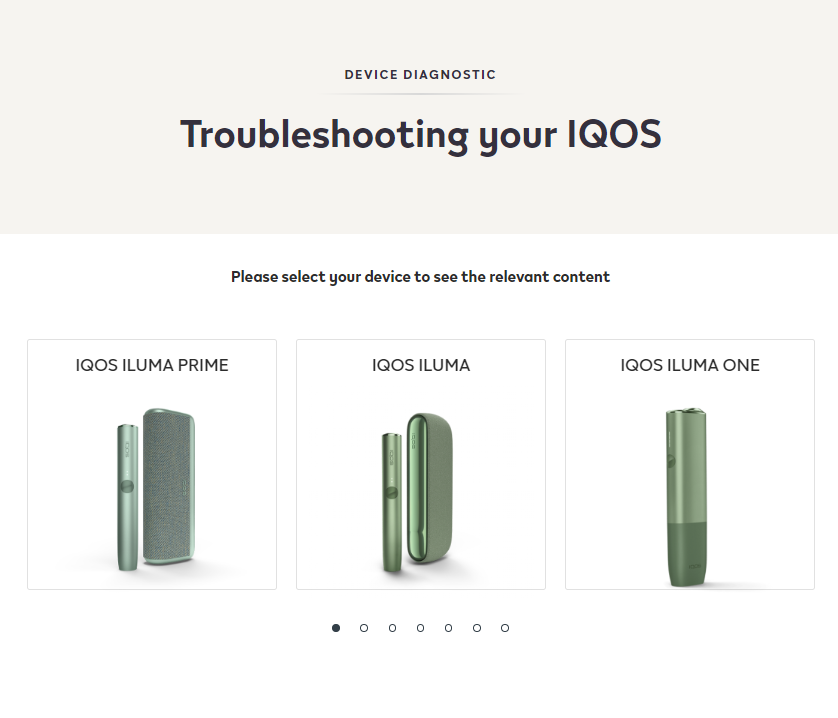
Users are asked to choose one of the devices listed. Obviously, it should be the one that they are using.
Step 1.5
In Step 1.5, the users are asked to choose the device model type if there are multiple models of the device they have chosen. If only a single model exists, then this step won’t be available for them so that they will jump to Step 2.

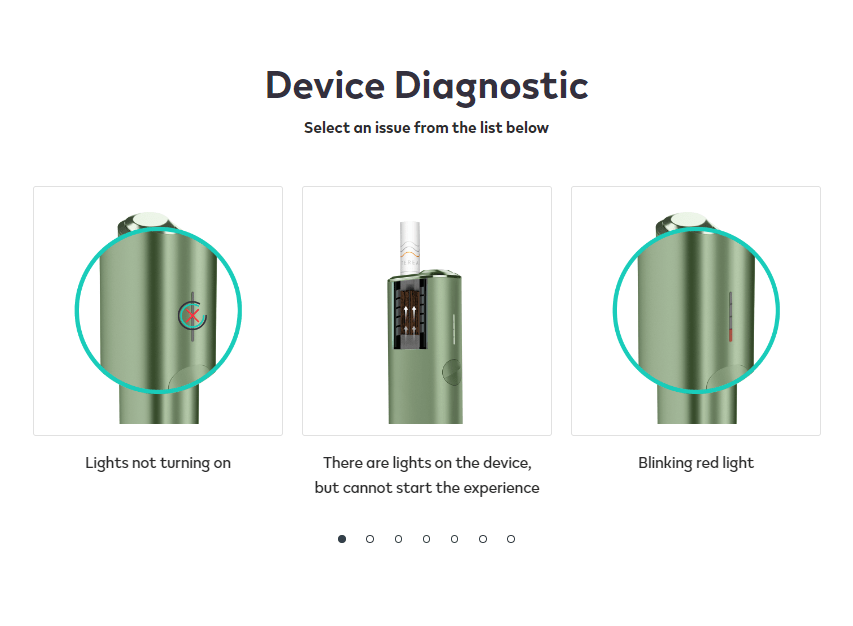
Step 2
In Step 2, the users should choose among the potential issues listed. Each issue is supported with an image or gif with a simple description.
Sub-Steps
There is a non-defined number of Sub-Steps after Step 2. Their number depends on the complexity of the issues. The better the problem has to be described, the more steps there will be.
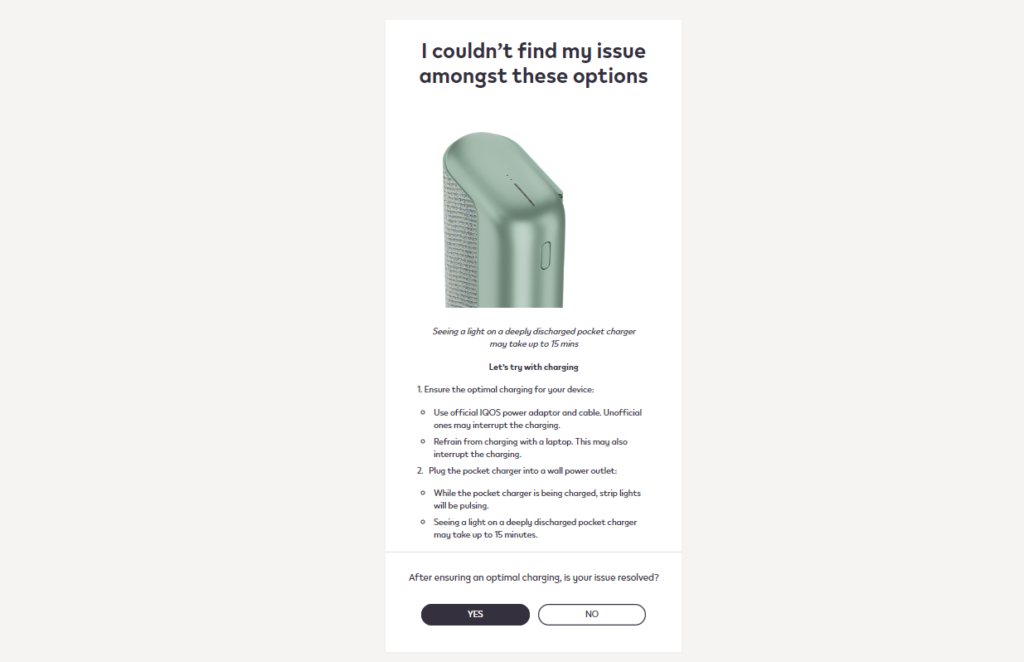
These steps cover issues ranging from those caused by a lack of user knowledge and technical matters to broken devices. Sub-steps actually represent the most critical part of the whole diagnostic system because they are where the possible solutions are listed.
To provide adequate support, we need some answers or feedback from customers; during this part of the diagnosis, they will often be asked to answer some yes/no questions or to confirm if the given description matches their issues. For example:
Is the device blinking? Yes / No
Is it blinking red? Yes / No
Is it blinking white? Yes / No
Solution: Your device needs to be charged.
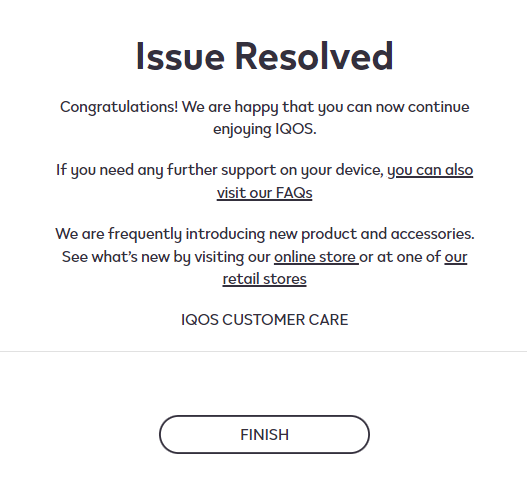
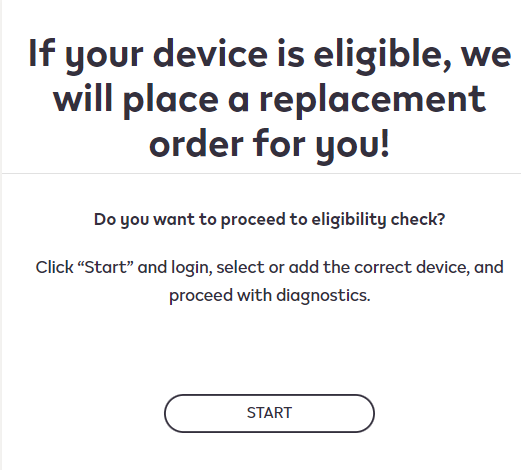
Ending Steps
The ending of the Device Diagnostic process is heterogeneous. These are the possible (and most common) solutions that the users will be provided with:
- The issue is resolved
- Apply for device replacement
Quality Assurance of the application
The quality assurance process of this application consisted of 2 main parts:
- Technical writing/issue coverage
- Technical quality
Regarding the issue coverage part, our goal was to cover as many issues as possible that the users may encounter. Obviously, this required good knowledge about the devices. We have maintained that by having a lot of internal communication with various staff members to get multiple views on the matter. Feedback from the previous users was of great help in this process. All this resulted in decent copies being used in Device Diagnostic.
The other part of my QA duty was testing the application’s technical functionality. I started by testing whether all of the content was updated as requested and whether the user could easily navigate the diagnostic process back and forth. Navigation is shown to be very important since it wouldn’t be user-friendly if the customer got stuck in a step that didn’t fit his or her issue, so they should start the diagnostic process from the beginning again. This situation could be very frustrating if the users run the application on their smartphones (most users access from phones). We saw all this in time and adjusted the program to work so that it is easy to use without this type of issue.