This simple project demonstrates how to create a basic interactive web page using HTML and JavaScript, and how to use Cypress for end-to-end testing. This example can serve as a foundation for more complex projects and showcases the seamless integration of these technologies to build and test web applications efficiently.
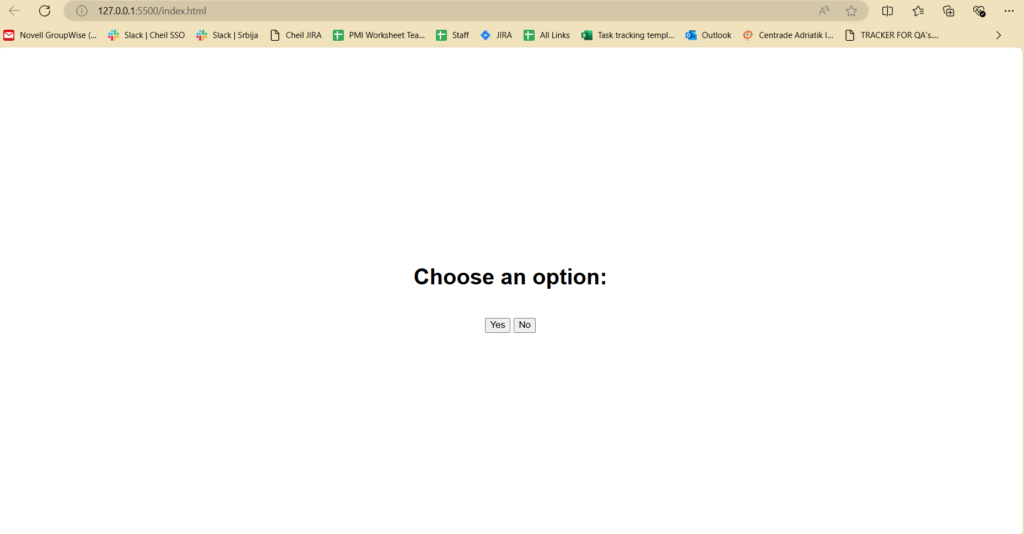
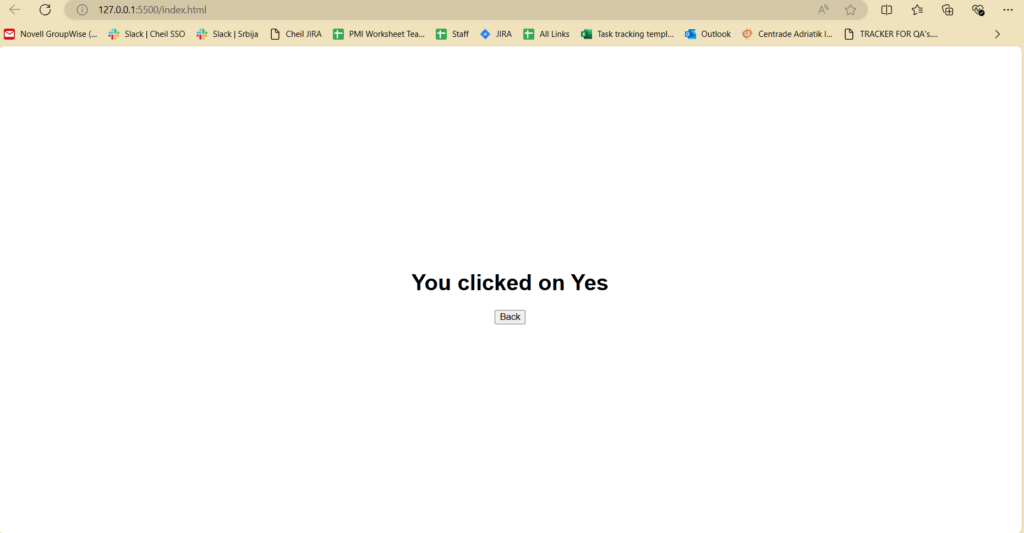
Here is what it looks like:
The main page
After clicking on the “Yes” button
After clicking on the “No” button

HTML (index.html)
Let’s start with the HTML structure of our webpage. Below is the complete HTML code for our example:
<!DOCTYPE html>
<html lang="en">
<head>
    <meta charset="UTF-8">
    <meta name="viewport" content="width=device-width, initial-scale=1.0">
    <title>Button Click Example</title>
    <style>
        body {
            font-family: Arial, sans-serif;
            display: flex;
            justify-content: center;
            align-items: center;
            height: 100vh;
            margin: 0;
            flex-direction: column;
        }
        .button-container {
            margin-top: 20px;
        }
    </style>
</head>
<body>
    <h1>Choose an option:</h1>
    <div class="button-container">
        <button onclick="showMessage('yes')">Yes</button>
        <button onclick="showMessage('no')">No</button>
    </div>

    <script src="index.js"></script>
</body>
</html>
Explanation:
- DOCTYPE: Declares the document type and version of HTML.
- HTML and Head Elements: Set the language and include metadata such as character set and viewport settings for responsive design.
- Title: Sets the title of the page as “Button Click Example”.
- Style: Defines CSS styles for the body and button container to center and style the content appropriately.
- Body: Contains the main content of the page. It includes a heading and a div with two buttons. Each button has an
onclickevent that triggers theshowMessagefunction with different parameters ('yes'or'no'). - Script: Includes an external JavaScript file (
index.js).
JavaScript (index.js)
Now, let’s take a look at the JavaScript code that handles the button click events:
document.addEventListener('DOMContentLoaded', (event) => {
    document.getElementById('yesButton').addEventListener('click', function() {
        showMessage('yes');
    });

    document.getElementById('noButton').addEventListener('click', function() {
        showMessage('no');
    });
});

function showMessage(choice) {
    let message = '';
    if (choice === 'yes') {
        message = 'You clicked on Yes';
    } else if (choice === 'no') {
        message = 'You clicked on No';
    }

    document.body.innerHTML = `
        <h1>${message}</h1>
        <button onclick="goBack()">Back</button>
    `;
}

function goBack() {
    location.reload();
}
Explanation:
- DOMContentLoaded Event: Ensures that the JavaScript code runs only after the DOM has fully loaded.
- Event Listeners: Adds click event listeners to the buttons. These listeners call the
showMessagefunction with the appropriate argument ('yes'or'no'). - showMessage Function: Displays a message based on the button clicked. It updates the entire body of the document with a new message and a “Back” button.
- goBack Function: Reloads the page to reset it to its original state when the “Back” button is clicked.
Cypress test
Let’s test these features in Cypress:
Cypress.on('uncaught:exception', (err, runnable) => {
    // returning false here prevents Cypress from
    // failing the test
    return false
})
describe('Button Click Example', () => {
    beforeEach(() => {
        // Visit the page before each test
        cy.visit('http://127.0.0.1:5500/index.html');
    });

    it('should display "You clicked on Yes" when the Yes button is clicked', () => {
        // Use the custom command to click the Yes button
        cy.contains('button', 'Yes').click();

        // Add a delay to observe the change
        cy.wait(500); // wait for 500 milliseconds

        // Check if the message "You clicked on Yes" is displayed
        cy.contains('h1', 'You clicked on Yes').should('be.visible');

        // Add a delay before clicking the Back button
        cy.wait(500); // wait for 500 milliseconds

        // Check if the Back button is displayed and click it
        cy.contains('button', 'Back').should('be.visible').click();

        // Add a delay to observe the change back to the main page
        cy.wait(500); // wait for 500 milliseconds
    });

    it('should display "You clicked on No" when the No button is clicked', () => {
        // Click the No button
        cy.contains('button', 'No').click();

        // Add a delay to observe the change
        cy.wait(500); // wait for 500 milliseconds

        // Check if the message "You clicked on No" is displayed
        cy.contains('h1', 'You clicked on No').should('be.visible');

        // Add a delay before clicking the Back button
        cy.wait(500); // wait for 500 milliseconds

        // Check if the Back button is displayed and click it
        cy.contains('button', 'Back').should('be.visible').click();

        // Add a delay to observe the change back to the main page
        cy.wait(500); // wait for 500 milliseconds

    });
});
Explanation:
- Cypress.on: Handles any uncaught exceptions to prevent Cypress from failing the test.
- describe Block: Groups all tests related to the “Button Click Example”.
- beforeEach Hook: Ensures that the page is visited before each test runs.
- it Blocks: Contain individual tests for each button click scenario.
- First Test: Clicks the “Yes” button, waits for the message to appear, verifies it, then clicks the “Back” button to return to the main state.
- Second Test: Similar to the first, the “No” button is tested.
Each test uses Cypress commands like cy.visit(), cy.contains(), and cy.wait() to interact with the page and verify that the expected behavior occurs.