Gathering user preferences is essential when building websites or web applications. Whether you’re conducting a survey, creating a sign-up form, or simply collecting feedback, using HTML and CSS allows you to create user-friendly and interactive forms. In this article, we’ll create a framework preference form that lets users select which front-end framework they prefer or specify an alternative if their choice isn’t listed.
Here is the HTML code that we are going to deconstruct:
<!DOCTYPE html>
<html lang="en">
<head>
    <meta charset="UTF-8">
    <meta name="viewport" content="width=device-width, initial-scale=1.0">
    <title>Framework Preference Form</title>
    <style>
        #other-text {
            display: none;
        }

        form:has(#other:checked) #other-text {
            display: block;
        }
    </style>
</head>
<body>
    <form>
        <fieldset>
            <legend>Which do you use?</legend>
            <label><input type="radio" name="framework" value="bootstrap"> Bootstrap</label><br>
            <label><input type="radio" name="framework" value="chakra"> Chakra</label><br>
            <label><input type="radio" name="framework" value="tailwind"> Tailwind</label><br>
            <label><input type="radio" name="framework" value="materialize"> Materialize</label><br>
            <label><input id="other" type="radio" name="framework" value="other"> Other</label><br>
            <input id="other-text" type="text" placeholder="Please specify">
        </fieldset>
    </form>
</body>
</html>Understanding the Code
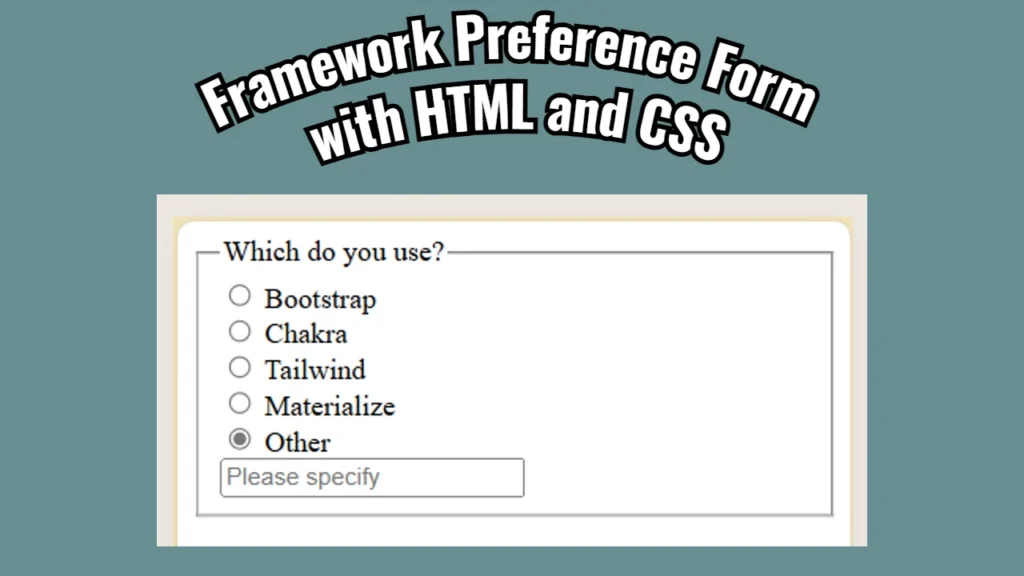
The form we create allows users to choose from popular front-end frameworks like Bootstrap, Chakra, Tailwind, and Materialize. Additionally, there’s an “Other” option that, when selected, reveals a text input field where users can specify a different framework.
The HTML Structure
HTML, or Hypertext Markup Language, is the backbone of web content. It structures the web page, defining headings, paragraphs, forms, and links. The tag is used in our form
legend tag provides a caption for the fieldset, which in this case is “Which do you use?”Within the fieldset, we use the label and input tags to create radio buttons for each framework. Radio buttons are ideal when you want users to select only one option from a list. Each input tag is assigned a name attribute with the value “framework,” grouping them together so that only one can be selected at a time.
<label><input type="radio" name="framework" value="bootstrap"> Bootstrap</label><br>This line of code creates a radio button for Bootstrap. The name attribute ensures that it belongs to the same group as the other radio buttons, while the value attribute holds the value that will be submitted with the form.
Adding Interactivity with CSS
CSS, or Cascading Style Sheets, styles HTML elements and controls their layout. In our form, we use CSS to make the “Other” text input field appear only when the corresponding radio button is selected.
#other-text {
    display: none;
}
form:has(#other:checked) #other-text {
    display: block;
}
The first rule hides the #other-text input field by default using display: none;. The second rule uses the :has pseudo-class to check if the “Other” radio button (#other) is checked. If it is, the #other-text field is displayed (display: block;).
Bringing It All Together
This form is a simple yet effective way to collect user preferences. It showcases how HTML structures your content and how CSS enhances the form’s interactivity. By understanding the code, you can easily adapt it to fit other scenarios, such as collecting different types of user preferences or feedback.
Whether you’re a beginner or an experienced developer, this code demonstrates how to create a user-friendly form that dynamically responds to user input, making your web pages more interactive and engaging.
