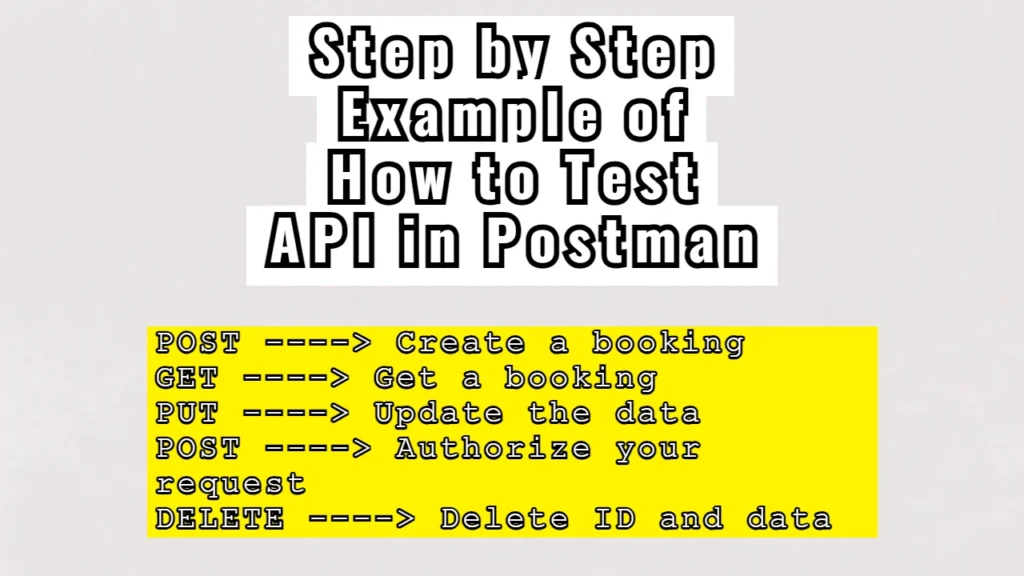
I will walk you through a step-by-step example of how to test an API using Postman. We’ll focus on a booking API, specifically the one source available at Restful Booker. I’ll show you how to create and send requests, validate responses, and even automate tests, all within Postman.
Request 1 – Create Booking
Create a POST request here:
https://restful-booker.herokuapp.com/booking
Add this JSON to the body text:
{
    "firstname": "Peter",
    "lastname": "The Great",
    "totalprice": 153,
    "depositpaid": true,
    "bookingdates": {
        "checkin": "2024-09-20",
        "checkout": "2024-09-23"
    },
    "additionalneeds": "Breakfast, Lunch, Dinner"
}
The values inside of the body text can be changed as you wish. Each time you run the request, it will generate a response with a fresh ID, as well as with the data you previously updated:
{
    "bookingid": 2842,
    "booking": {
        "firstname": "Peter",
        "lastname": "The Great",
        "totalprice": 153,
        "depositpaid": true,
        "bookingdates": {
            "checkin": "2024-09-20",
            "checkout": "2024-09-23"
        },
        "additionalneeds": "Breakfast, Lunch, Dinner"
    }
}
We will need that bookingid number we received for the next steps of the test.
Also, we can include some testing of the request through script. Here is a good example:
// Status Code Validation
pm.test("Status code is 200", function () {
    pm.response.to.have.status(200);
});

// Response Time Validation
pm.test("Response time is less than 500ms", function () {
    pm.expect(pm.response.responseTime).to.be.below(500);
});

// Parse JSON Response
var jsonData = pm.response.json();

// Verify Booking ID was generated
pm.test("Booking ID is generated", function () {
    pm.expect(jsonData.bookingid).to.exist;
    pm.expect(jsonData.bookingid).to.be.a("number");
});

// Check Booking Name
pm.test("Booking name is correct", function () {
    pm.expect(jsonData.booking.firstname).to.eql("Peter");
    pm.expect(jsonData.booking.lastname).to.eql("The Great");
});

// Verify Total Price and Deposit Status
pm.test("Total price and deposit status are correct", function () {
    pm.expect(jsonData.booking.totalprice).to.eql(153);
    pm.expect(jsonData.booking.depositpaid).to.be.true;
});

// Check Booking Dates
pm.test("Booking dates are correct", function () {
    pm.expect(jsonData.booking.bookingdates.checkin).to.eql("2024-09-20");
    pm.expect(jsonData.booking.bookingdates.checkout).to.eql("2024-09-23");
});

// Verify Additional Needs
pm.test("Additional needs are correct", function () {
    pm.expect(jsonData.booking.additionalneeds).to.eql("Breakfast, Lunch, Dinner");
});
Request 2 – GET Booking that we previously created
Now we should create another request, this time GET navigating to this path:
https://restful-booker.herokuapp.com/booking/2842
After a few minutes the booking ID received during the booking creation, /2842 in this case, will probably stop working so while making this request we may get following errors:
- Couldn’t evaluate the test script:JSONError: Unexpected token ‘N’ at 1:1 Not Found ^
- 404 Not found
To fix that, we have to make a new request in the creation part, generate a new booking ID, and replace the one given here.
A successful request should print a JSON result based on the created request previously made:
{
    "firstname": "Peter",
    "lastname": "The Great",
    "totalprice": 153,
    "depositpaid": true,
    "bookingdates": {
        "checkin": "2024-09-20",
        "checkout": "2024-09-23"
    },
    "additionalneeds": "Breakfast, Lunch, Dinner"
}
As we can see, it worked out perfectly in our case.
We can test this response with the following Postman script:
// Parse JSON response
const response = pm.response.json();

// Status Code Validation
pm.test("Status code is 200", function () {
    pm.response.to.have.status(200);
});

// Response Time Validation
pm.test("Response time is less than 500ms", function () {
    pm.expect(pm.response.responseTime).to.be.below(500);
});

// Verify First Name
pm.test("First name is Peter", function () {
    pm.expect(response.firstname).to.eql("Peter");
});

// Verify Last Name
pm.test("Last name is The Great", function () {
    pm.expect(response.lastname).to.eql("The Great");
});

// Verify Total Price
pm.test("Total price is correct", function () {
    pm.expect(response.totalprice).to.eql(153);
});

// Verify Deposit Paid Status
pm.test("Deposit is paid", function () {
    pm.expect(response.depositpaid).to.be.true;
});

// Verify Booking Dates
pm.test("Check-in date is correct", function () {
    pm.expect(response.bookingdates.checkin).to.eql("2024-09-20");
});

pm.test("Check-out date is correct", function () {
    pm.expect(response.bookingdates.checkout).to.eql("2024-09-23");
});

// Verify Additional Needs
pm.test("Additional needs include Breakfast, Lunch, and Dinner", function () {
    pm.expect(response.additionalneeds).to.eql("Breakfast, Lunch, Dinner");
});
Request 3 – Update Booking
In order to update (change) our previously created booking, we have to use the PUT or PATCH option. We should use the PATCH option if we want to make fragmentary changes (like changing only the first name). If we want to change the whole response, we should use the PUT option.
So let’s make a PUT request:
https://restful-booker.herokuapp.com/booking/2353
Again, just in the case with GET booking, we should make sure that we are using a fresh booking ID, because after some time the ID will stop working. We should then navigate back to the first (POST) request and get a new ID.
Now, our task in this part is to update the values inside the JSON data we previously generated. We can copy and paste it into the body (raw) of our PUT request. Here is an example that I will use for this demonstration:
{
    "firstname" : "Ozzy",
    "lastname" : "Osbourne",
    "totalprice" : 666,
    "depositpaid" : true,
    "bookingdates" : {
        "checkin" : "2024-09-23",
        "checkout" : "2025-01-02"
    },
    "additionalneeds" : "A crazy train"
}
Authorization error + solution (Request 4)
When we send this request, we may get a 403 forbidden error. The 403 error generally implicates an issue with the authorization. This means that some additional steps (security-related) should be taken.
If we look at our project source, we will find 2 ways offered to manage the authorization:
| Cookie | string | Sets an authorization token to access the PUT endpoint, can be used as an alternative to the Authorization Default value: token=<token_value> |
| Authorization | string | Basic authorization header to access the PUT endpoint, can be used as an alternative to the Cookie header Default value: Basic YWRtaW46cGFzc3dvcmQxMjM= |
Let’s do it this time with the Cookie option. What we have to do is to create a separate POST request that will manage the authorization. This is the path we have to use in this case:
https://restful-booker.herokuapp.com/auth
In the Body section we have to update the JSON that is given in our source:
{
    "username" : "admin",
    "password" : "password123"
}
When we run this POST request we should receive the token:
{
    "token": "3fcd3b0899288ce"
}
When we get the token, we should navigate back to the PUT (3rd) request and update the header with the cookie. As we open the header, in the Key section, we should put Cookie, while in the value section we should put this value token=<token_value>, although this part <token_value> should be replaced with the token we previously received. So the value in our case should look like this: token=3fcd3b0899288ce
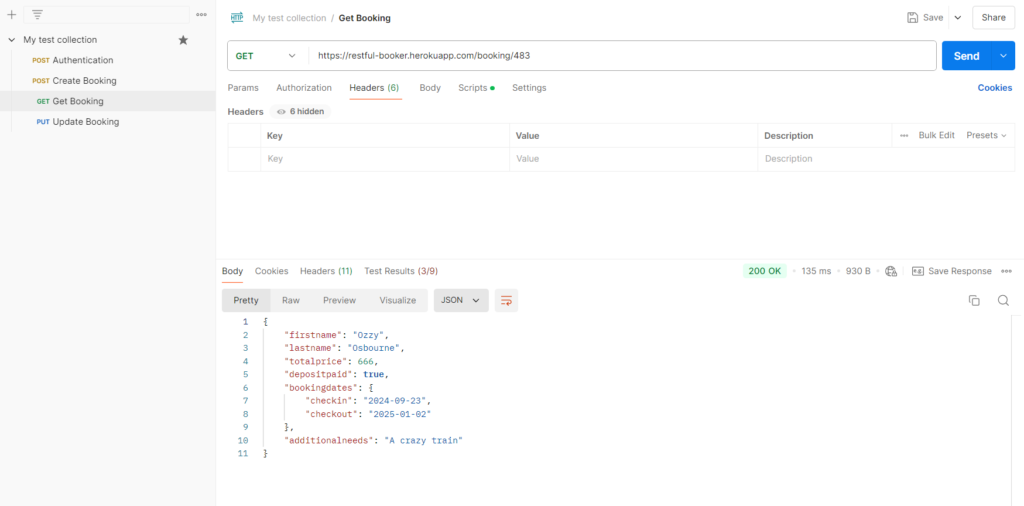
Check if the PUT request was successful
After running this PUT request, the values set in the body text should be updated. We can check if it was successfully done by navigating back to the GET booking (2nd) request and running it. If the new values appear, then our PUT request was pretty much successful:
Final request – DELETE
In order to make a DELETE request we have to add the following path with the most fresh ID included:
https://restful-booker.herokuapp.com/booking/4056
To make a DELETE request, we also have to authorize it. Just as in the previous example, we can use the COOKIE or the AUTHORIZATION method to do it. Now, let’s do it using AUTHORIZATION instead of COOKIE. Unlike in the case with COOKIE, we don’t have to generate a token, but we have to use the value given in our source. We navigate to the Headers section inside of our DELETE request, and we update the Key to Authorization while we update the value to Basic YWRtaW46cGFzc3dvcmQxMjM=
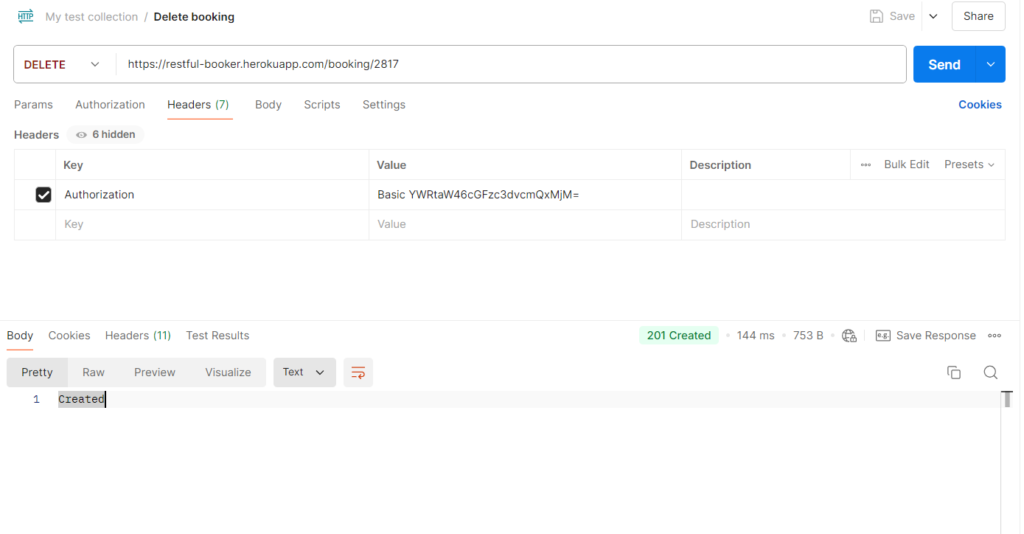
If we successfully managed to do it, after sending out the request, we should receive the following status and body text result: 201 Created
As a final test, we have to navigate back to the GET booking request and send out the request. If we receive a 404 Not Found reply, it means that we have successfully deleted the ID and data related to it. With it included, we have basically successfully finished this testing session 🙂