When I started working on the Blueprint Account Manager App, my goal was simple: to create a solid, easy-to-use foundation for building more complex applications. I wanted a structured, well-documented repository that creators could pick up quickly—whether for learning, testing, or expanding into larger projects.
This guide is more than just documentation; it’s a walkthrough of the app’s architecture, key features, and how it seamlessly integrates with modern development tools. From setting up MongoDB connections to implementing CI/CD automation with GitHub Actions and Railway, I’ve covered everything you need to understand and run the project efficiently.
If you’re ready to explore, check out the live app here:
🔗 Blueprint Account Manager App
Or dive into the GitHub repository to see the source code:
🔗 GitHub Repository
App Features
Here is the list of features the Blueprint covers:
- Homepage
- Register
- Login
- Dashboard
- Reset Password
- Forgot Password
- Change Password
- Password Encryption
- Automated Email-sending system for password reset
- Dynamically update notes for a single account in the dashboard
- Delete Account
- All data saved in a MongoDB database
Technologies used for building the app:
Front end
- HTML
- CSS
- JavaScript
Back end
- Node JS
- Express JS
Database
- MongoDB
Repository & Continuous Integration
- GitHub
Deployment & Continuous Delivery
- Railway
Testing
- Cypress
- JMeter
- Postman
Repository Overview
This repository is structured to support both development and testing processes. Below is a breakdown of the key folders and files.
Folder Structure
- .github/workflows/
- This folder contains the GitHub Actions workflows used for CI/CD automation. The
JmeterTest.ymlworkflow runs automated JMeter tests to ensure performance benchmarks are met.
- This folder contains the GitHub Actions workflows used for CI/CD automation. The
- Jmeter/
- This folder includes JMeter test scripts that simulate load testing and performance validation for the application.
- If you need to execute JMeter tests, simply navigate into this folder and run the JMeter test plan.
- cypress/
- This folder contains Cypress end-to-end (E2E) test scripts for UI and API testing.
- Cypress tests validate critical workflows and ensure the application behaves as expected.
- Postman/
- The Postman folder contains a test file that is running a test against the API Callback Functions defined in the api.js file.
Key Files
- src/
- This is the core source code directory where the main application logic is implemented.
- The
index.jsfile serves as the entry point for execution. It is the server for the app. - The app.js file contains the API Callback Functions.
- The mongo.js contains the data related to integrating the app with the MongoDB database.
- templates/
- This folder holds the front-end configuration.
- .gitignore
- Defines ignored files and directories that should not be tracked by Git.
- README.md
- This file provides an overview of the repository, including installation instructions and key usage details.
- cypress.config.js
- Configuration settings for Cypress tests.
- package.json & package-lock.json
- These files manage the project’s dependencies, scripts, and metadata. Use
npm installto install dependencies before running the application.
- These files manage the project’s dependencies, scripts, and metadata. Use
Running the Application To get started, follow these steps:
- Clone the repository:
git clone <repository-url> - Navigate to the project directory:
cd blueprint-account-manager - Install dependencies:
npm install - Run the application:
node src/index.js
Index.js dependencies installation
# Initialize a new Node.js project (if not already initialized)
npm init -y

# Install required dependencies
npm install express dotenv express-session connect-mongo bcrypt nodemailer path crypto

# Install MongoDB dependencies
npm install mongoose

# (Optional) Install nodemon for development (to auto-restart server on changes)
npm install --save-dev nodemon
Explanation of Dependencies:
express: Web framework for handling routes and requests.dotenv: Loads environment variables from a.envfile.express-session: Manages user sessions.connect-mongo: Stores sessions in MongoDB.bcrypt: Hashes passwords securely.nodemailer: Sends emails (used for password reset).path: Handles file paths.crypto: Generates secure random tokens.mongoose: Connects and interacts with MongoDB.
How to Set Up the mongo.js MongoDB Connection File
This mongo.js file is responsible for establishing a connection to MongoDB using Mongoose, defining schemas for users, and exporting the models for use in other parts of your application. Below is a detailed breakdown of the setup.
Install Required Dependencies
Before setting up the mongo.js file, ensure you have installed the necessary packages:
npm install mongoose dotenvmongoose: Allows interaction with MongoDB in an object-oriented way.dotenv: Enables loading environment variables from a.envfile.
Running Tests To execute tests, use the following commands:
- Run Cypress tests:
npx cypress open - Run JMeter tests:
jmeter -n -t Jmeter/test-plan.jmx -l result.jtl
Contribution Guidelines
If you wish to contribute to this repository, please follow these steps:
- Fork the repository.
- Create a new branch for your feature/fix.
- Commit your changes with meaningful commit messages.
- Push your changes and create a pull request.
CI/CD Demonstration
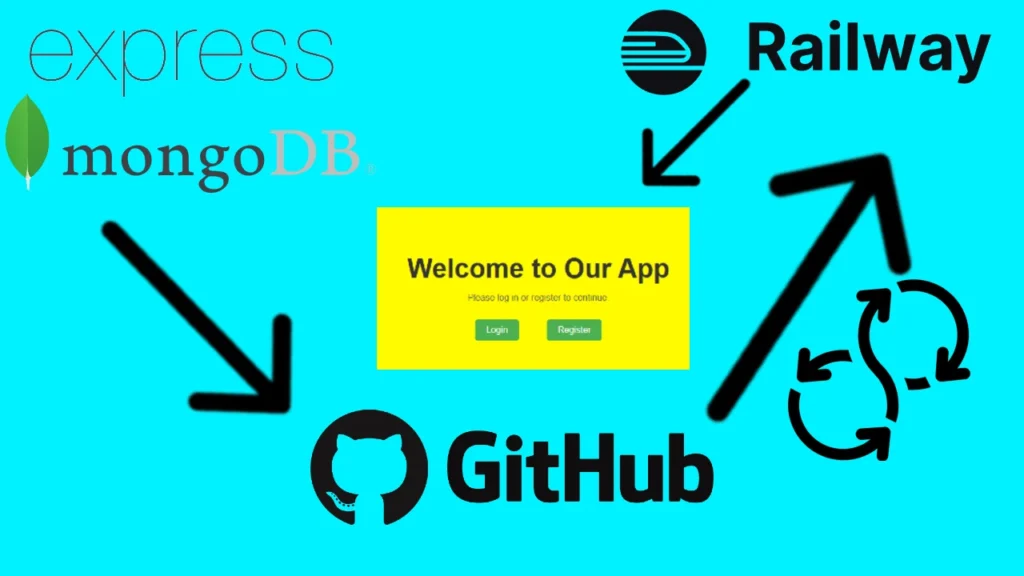
This project serves as a well-structured and practical demonstration of a Continuous Integration and Continuous Deployment (CI/CD) pipeline, showcasing how automation can streamline development, testing, and deployment processes. The primary technologies used to achieve this are GitHub and Railway, each playing a crucial role in ensuring the reliability and efficiency of the pipeline.
Understanding CI/CD in This Project
CI/CD is a methodology used in modern software development that aims to reduce manual effort and increase automation in code integration, testing, and deployment.
- Continuous Integration (CI) ensures that new code changes are automatically tested and merged into the main branch without breaking the application.
- Continuous Deployment (CD) ensures that successfully tested changes are automatically deployed to the live environment without requiring manual intervention.
Role of GitHub in CI
GitHub, a widely-used version control and collaboration platform, is responsible for handling the CI aspect of this project. The repository is set up with GitHub Actions, a powerful automation tool that allows developers to define workflows for running tests, linting code, and validating changes before they are merged into the main branch.
Key CI Processes Managed by GitHub
- Automated Testing:
- Whenever a new change is pushed to the repository, GitHub Actions triggers a workflow to run unit and integration tests.
- Tools like Cypress (for UI and API testing) and JMeter (for performance testing) are executed as part of the workflow.
- Code Quality Checks:
- Linting and static analysis tools ensure that the code follows best practices before being merged.
- This prevents common issues like syntax errors, security vulnerabilities, and code inconsistencies.
- Build Verification:
- GitHub Actions ensures that the codebase compiles and runs without issues.
- If the build fails, the CI pipeline halts, preventing faulty code from reaching production.
- Artifact Storage:
- CI workflows generate build artifacts (e.g., compiled code, test reports) that can be stored for further analysis or later deployment.
Role of Railway in CD
Railway is a cloud-based deployment platform that takes care of the Continuous Deployment (CD) process in this project. Once the code has passed all CI checks, Railway automatically deploys the latest version to the live environment.
We want to make sure that the Wait for CI option is activated in our Railway project. In that case, the deployment process will first wait for the workflow testing (GitHub Actions) to get a green light (all tests passed) and just then pull the new changes.

Key CD Processes Managed by Railway
- Automatic Deployment:
- Railway listens for changes in the GitHub repository.
- When a new commit is merged into the main branch, Railway fetches the latest code and deploys it to the designated environment.
- Environment Management:
- Railway allows for different deployment environments (e.g., development, staging, production).
- This ensures that features can be tested in a controlled environment before being pushed to production.
- Scalability & Monitoring:
- Railway provides automatic scaling based on traffic and usage.
- Built-in monitoring and logging features help track application health and performance.
- Rollback Mechanism:
- If a deployment introduces unexpected issues, Railway enables quick rollbacks to a previous stable version.
- This reduces downtime and prevents prolonged disruptions.
Summary of CI/CD Flow in This Project
- A developer pushes changes to the GitHub repository.
- GitHub Actions triggers the CI workflow:
- Runs tests, code quality checks, and build verification.
- If any step fails, the process stops, and the developer is notified.
- If CI is successful, Railway automatically pulls the latest changes and deploys them.
- The application is live with minimal manual intervention.
How to Use This GitHub Repository
Cloning or Downloading the Repository
To get started with this repository, you have multiple options:
1. Clone via Git Command (Recommended for Developers)
If you have Git installed on your system, you can clone the repository using the following command:
git clone https://github.com/NoToolsNoCraft/Blueprint-Account-Manager-App.gitThis method is recommended if you plan to contribute to the project or actively develop using Git.
2. Download Using GitHub Desktop App
If you prefer a graphical interface, you can use the GitHub Desktop App:
- Open the GitHub Desktop application.
- Click on File > Clone Repository.
- Enter the repository URL or search for it.
- Select a local path to save the project.
3. Download as a ZIP File (Quick Setup)
For a quick setup without Git, you can simply download the repository as a ZIP file:
- Visit the repository page: GitHub Repository
- Click on the Code button.
- Select Download ZIP.
- Extract the ZIP file to your desired location.
Key Folders and Files
This repository is structured to support both development and testing processes. Below is a breakdown of the key folders and files.
Core Development Files (Essential for Building the App)
src/ – Main Application Logic
index.js– Entry point for executing the server.app.js– Contains the API callback functions that handle application logic.mongo.js– Handles MongoDB database integration and interactions.
templates/ – Front-End Configuration
This folder contains the templates for rendering the front-end views.
package.json & package-lock.json – Project Dependencies
- These files define the dependencies required to run the application.
- Run
npm installto install the necessary packages before starting development.
.gitignore – Git Ignored Files
Defines files and directories that should not be tracked by Git (e.g., node_modules/).
README.md – Project Overview
Provides installation instructions, usage details, and project documentation.
Testing & CI/CD Automation Files (Optional for Running Tests)
If you want to ensure the application works correctly, you can utilize the following testing tools:
cypress/ – End-to-End (E2E) Testing
- Contains Cypress test scripts for UI and API testing.
- Cypress tests validate critical workflows and ensure the application behaves as expected.
- Run Cypress tests using
npx cypress openornpx cypress run.
Postman/ – API Testing
- Contains a Postman test collection that runs API tests against the callback functions in
app.js. - Import the collection into Postman to manually test API endpoints.
Jmeter/ – Load & Performance Testing
- Includes JMeter test scripts for performance validation.
- Navigate to this folder and execute the JMeter test plan if needed.
.github/workflows/ – CI/CD Automation
- Contains GitHub Actions workflows for automated testing and deployment.
JmeterTest.ymlruns automated JMeter tests to ensure performance benchmarks.
cypress.config.js – Cypress Configuration
Defines settings for Cypress test execution.
Next Steps
Once you have cloned or downloaded the repository, follow these steps to get started:
- Install dependencies: Run
npm installinside the project directory. - Set up your MongoDB database (modify
mongo.jsif needed). - Start the application: Run
node src/index.jsto launch the server. - Optionally run tests using Cypress, JMeter, or Postman to verify the functionality.