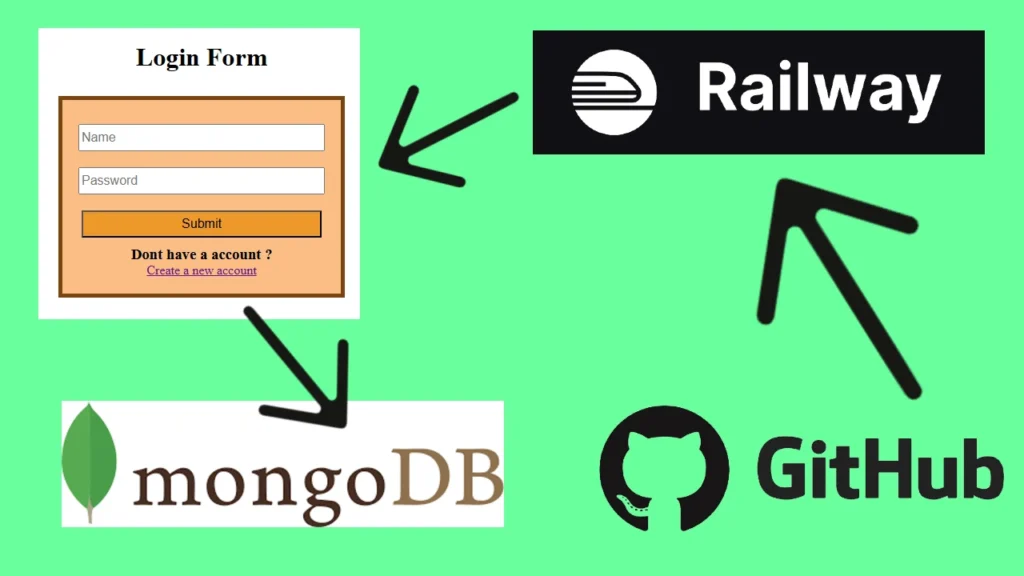
The Account Manager App is a simple web application built using Node.js and Express.js, integrated with a MongoDB database. The app allows users to sign up, log in, change their password, delete their account, and log out. The data is stored and updated in MongoDB, providing a reliable and scalable backend solution.
You can access the live app here.
The source code is available on GitHub here.
This app is hosted with Railway.com integrated with the GitHub repository where the source code is placed. You may read more about integrating GitHub with Railway here: https://notoolsnocraft.tech/why-we-chose-railway-for-deploying-our-node-js-application/
How to use the app
These are the pages available in the app:
- The default page/login page: https://account-manager-app-express-mong-production.up.railway.app/
- Sign Up page: https://account-manager-app-express-mong-production.up.railway.app/signup
- Dashboard/Homepage: https://account-manager-app-express-mong-production.up.railway.app/home
By landing on the default page, we will see a login form. We can use it if we already have an account, but since you are probably a new user you should click on the Create a new account button in order to move to the Sign Up page where you can create your account by inserting an username and password that you wish.
After successfully creating an account you should end up on the dashboard page. There should be different options such as possibility to change the password, to delete the account or to logout.
Technologies Used for building the app
- Node.js: JavaScript runtime used for building the backend.
- Express.js: A web application framework for Node.js that simplifies routing and middleware management.
- MongoDB: A NoSQL database used for storing user credentials and session data.
- Mongoose: An ODM (Object Data Modeling) library for MongoDB and Node.js, which provides a higher-level abstraction for working with MongoDB and makes the connection between the app and the MongoDB database simpler.
- Express-session: Middleware to manage user sessions.
- MongoStore: A MongoDB session store used in conjunction with express-session to store session data in MongoDB.
Data Flow and Backend Logic
Database Integration
The app interacts with MongoDB through Mongoose, which provides an easy-to-use interface for interacting with the database. The user information is stored in a collection called LogInCollection.
MongoDB Schema for User Authentication:
const logInSchema = new mongoose.Schema({
    name: { type: String, required: true },
    password: { type: String, required: true }
});
The schema contains two fields: name (the username) and password (the user’s password). The app uses this schema to perform CRUD operations on the LogInCollection.
Signup Process
- When a user signs up, their credentials are sent to the server via a
POSTrequest to the/signupendpoint. - The server checks if the username already exists in the MongoDB database.
- If the username does not exist, a new user document is created in the database using
insertMany(), and the user is logged in immediately. - If the username already exists, the server responds with an error message.
Login Process
- When a user logs in, the credentials are sent via a
POSTrequest to the/loginendpoint. - The server checks if the provided username and password match an existing user document in the MongoDB database.
- If the credentials match, a session is created, and the user is redirected to the homepage (
/home). - If the credentials do not match, the user is shown an error message.
Change Password Process
- When a user wants to change their password, they send a
POSTrequest to the/change-passwordendpoint with the old and new passwords. - The server checks if the old password matches the one in the database.
- If the old password is correct, the password is updated using
updateOne(). - If the old password is incorrect, the user receives an error message.
Delete Account Process
- When a user requests to delete their account, a
POSTrequest is made to the/delete-accountendpoint. - The server checks if the user is logged in.
- If the user is logged in, the server deletes their account from the MongoDB collection using
deleteOne(). - The user is logged out, and the session is destroyed.
Logout Process
- When a user logs out, a
POSTrequest is sent to the/logoutendpoint. - The server destroys the user’s session, effectively logging them out.
Step-by-Step Guide to Set Up the Project in Visual Studio Code
Follow these steps to set up the Account Manager App locally in Visual Studio Code:
Prerequisites
Before setting up the project, ensure that you have the following installed:
- Node.js: Download Node.js
- MongoDB: Set up a MongoDB database either locally or use a cloud provider such as MongoDB Atlas.
- Git: Download Git
1. Clone the Repository
Clone the project repository to your local machine by running the following command in your terminal:
git clone https://github.com/NoToolsNoCraft/Account-Manager-App-Express-MongoDB.git2. Navigate to the Project Directory
Once the repository is cloned, navigate to the project directory:
cd Account-Manager-App-Express-MongoDB3. Install Dependencies
To install the required dependencies, use the following command:
npm install
This command will install the necessary packages listed in the package.json file, such as express, mongoose, express-session, connect-mongo, and others.
4. Set Up Environment Variables
The app uses environment variables to store sensitive information like the MongoDB database URL and session secret. Create a .env file in the root of the project and add the following content:
DATABASE_URL=your-mongodb-connection-string
SESSION_SECRET=your-session-secret
Make sure to replace your-mongodb-connection-string with the connection URL for your MongoDB database and your-session-secret with a secret key for session management.
5. Run the Application
Once all dependencies are installed and the .env file is set up, you can start the application by running the following command (if the start command is set in the package.json):
npm startor
node src/index.jsThis will start the server on the specified port (default is 5000). You can now access the app by opening your browser and going to http://localhost:5000. It should land you on the login page by default.
6. Test the App
You can test the app locally by visiting the following routes:
- Signup:
http://localhost:5000/signup - Login:
http://localhost:5000/ - Home: After logging in, go to
http://localhost:5000/home
App Structure
- index.js: Contains the main Express server setup, routes for signup, login, password change, account deletion, and logout.
- mongo.js: Contains the Mongoose setup and schema definition for storing user data in MongoDB.
- views/: Contains the Handlebars (
.hbs) templates for rendering the frontend (login, signup, home, etc.). - public/: Contains static files like stylesheets, images, and JavaScript for the frontend.
Installing dependencies for the index.js file
To set up the dependencies needed for your server code, follow these steps:
Step-by-Step Commands:
- Initialize a new Node.js project (if not already initialized):
npm init -yThis will create a package.json file with the default configuration.
- Install necessary dependencies:
You will need to install express, path, dotenv, express-session, connect-mongo, and mongoose.
npm install express path dotenv express-session connect-mongo mongooseexpress: For the web framework.path: To handle file paths.dotenv: To manage environment variables from a.envfile.express-session: For handling user sessions.connect-mongo: To store session data in MongoDB.mongoose: For MongoDB interactions.
- Create a
.envfile for environment variables:
touch .env- Add environment variables to the
.envfile:
Open .env in your code editor and add the following configuration:
SESSION_SECRET=your_secret_key_here
DATABASE_URL=mongodb://localhost:27017/your_database_name
PORT=5000
Replace your_secret_key_here with a strong secret key, and your_database_name with your MongoDB database name.
- Ensure MongoDB is running:
If you’re using a local MongoDB instance, ensure that it is running. If using a cloud-based service like MongoDB Atlas, ensure that your database URL is correct.
- Run the server:
Once everything is set up, start your server with the following command:
node src/index.jsOptional:
- Install nodemon (for easier development):
If you’d like to auto-restart the server whenever you change your code, install nodemon:
npm install --save-dev nodemonYou can then start the server with:
npx nodemon src/index.jsThat’s it! You should now have all dependencies installed and the server running with session handling and MongoDB integration.
Setting up dependencies for mongo.js file
Step-by-Step Commands:
- Ensure your Node.js project is initialized:
If you haven’t already done so, initialize a Node.js project:
npm init -yThis will create a package.json file.
- Install the required dependencies:
Your mongo.js file requires mongoose and dotenv. Install them using:
npm install mongoose dotenvmongoose: To interact with MongoDB.dotenv: To load environment variables from a.envfile.
- Set up a
.envfile for environment variables:
If you don’t already have a .env file in your project, create one:
touch .env- Add the MongoDB connection URL to
.env:
Open the .env file in a text editor and add the following:
DATABASE_URL=mongodb://localhost:27017/your_database_name- Replace
your_database_namewith the name of your MongoDB database. - If you’re using MongoDB Atlas or another hosted MongoDB service, replace the URL with your connection string.
- Ensure MongoDB is running:
- If you’re using a local MongoDB server, make sure it is started. You can start MongoDB with:
mongod- If you’re using MongoDB Atlas, ensure your database is set up and accessible with the provided connection string.
- Test the
mongo.jsfile:
You can test the connection and schema definition by creating a simple script (e.g., testMongo.js) that requires mongo.js:
const LogInCollection = require("./mongo");

(async () => {
    try {
        const newUser = new LogInCollection({ name: "testUser", password: "testPass" });
        await newUser.save();
        console.log("User saved successfully");
    } catch (error) {
        console.error("Error saving user:", error);
    }
})();
Run this script with:
node testMongo.jsIf the connection is successful and no errors occur, your mongo.js setup is complete.


