I will explain how to resolve the 403 forbidden error. Or, at least, I will present some possible solutions for this issue. Recently, I received a 403 error on this website. The error appeared when I logged on to the front end. I was totally unable to enter the admin role. Now, this wasn’t the first time I’ve received this issue on my websites. However, this time, it was a bit specific.
How do we diagnose the 403 error?
There is a specific procedure for diagnosing the 403 error. Also, there is no single possible cause; there are multiple. It may be cache-related and authorization, but it may also be IP-related.
My diagnostic procedure for this issue in short lines looks like this:
- First, I exclude the reasons I’m convinced are not causing this issue.
- Second, I test possible causes.
- Third, I go into the final testing phase of the cause, which is most likely the root of the error.
What can I exclude as a cause?
The 403 forbidden error is standard in environments requiring authorization to enter the system. It is typical for cases where the user wants to access the staging or admin versions of the website. In my case, the 403 error appeared both when I tried to access the admin and the live version of the website, and I couldn’t even reach the authorization page. It was a clear sign that this error wasn’t related to authorization.
Let’s get into possible causes
I prefer to start the second testing phase to see if this issue is cache-related. Lemme list a few steps down here that I test first immediately after I meet this error:
- I restart the browser. Sometimes, when I simply restart my browser and open the website again, there is no more issue.
- If the issue still persists, I try it with other browsers.
- Deleting the browser cache is another thing that may fix this issue.
- Opening the website in incognito mode.
- Trying opening the website on different devices (on a mobile phone or tablet for example, or another PC)
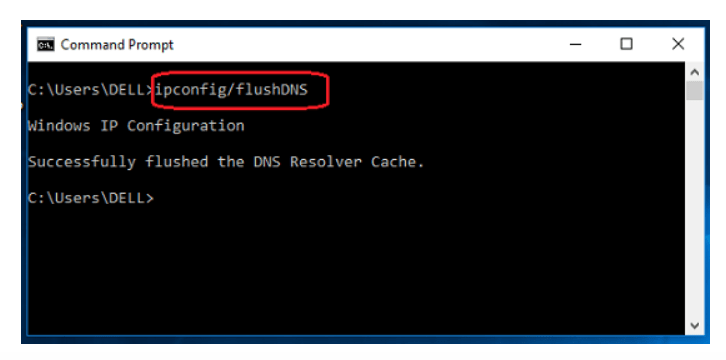
- When none of the above-mentioned steps help, I go for the DNS cache cleaning. It is done by running a simple command (ipconfig/flushdns) in the Command Prompt.
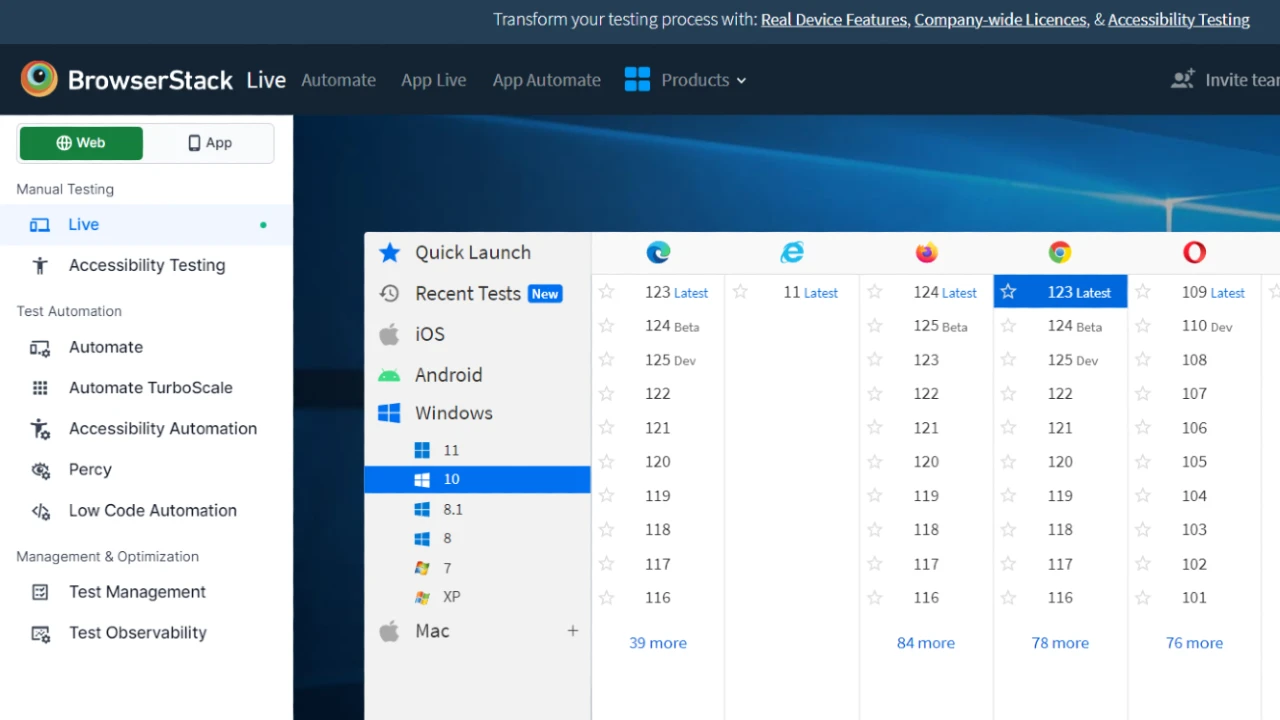
If none of the above-mentioned steps fix the issue, I prefer to do one more check before I contact the hosting customer support team. That is, I try running the website through testing platforms like Cypress or BrowserStack. This time I found BrowserStack to be the most fitting.
Testing website through BrowserStack
I have already written about BrowserStack testing features in one of my articles. This time, I needed it to see if it could open my website, Notoolsnocraft.tech, without getting any errors. BrowserStack allows users to test their website from a third-party IP address, which is just what I’ve needed in this situation.
So, there are 2 possible results that we may conclude from the BrowserStack testing results:
- If the website shows an error while opening from a third-party ID position, then there is likely an issue with the website itself.
- If the website works without showing the 403 (or other) error, we can conclude that the problem is on my (specific user) side. To be more precise, the problem is in our ID.
Results:
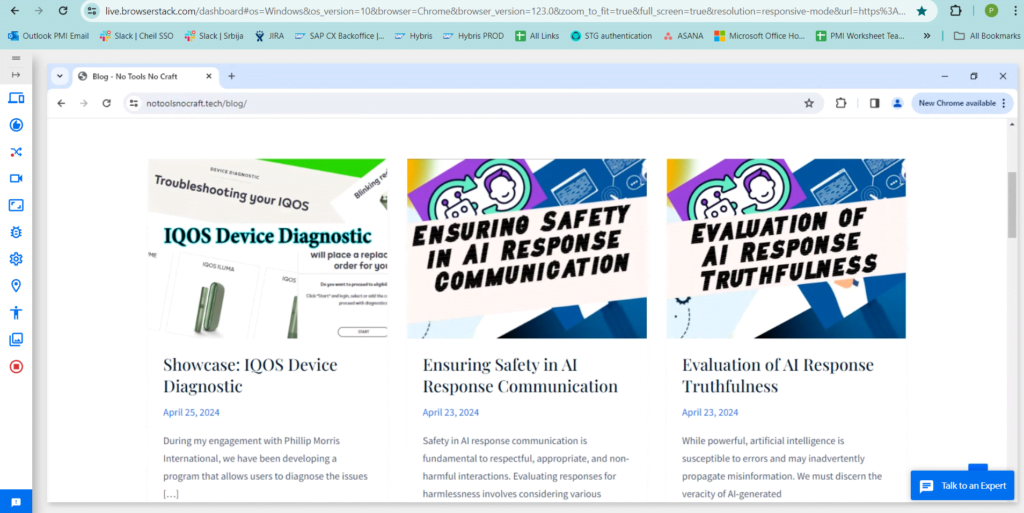
BrowserStack successfully opened both the front end and the admin version of the website without showing any errors. At this point I could only conclude that something is going on with the IP my devices are related to.
Reaching out to the hosting provider
Since I’ve tested all possible features associated with this issue, I had no choice but to contact my hosting provider. Hostinger customer support guys are known to be true professionals, which has been proven this time as well.
The Resolution
Finally, the issue was fixed. This is an excellent example of why having a hosting provider with a professional customer support crew matters. Thanks to Igor from the Hostinger support team.
Namely, as I reached customer support, I listed the stuff I tested and implemented to check if it would solve the issue. Since none of this worked, I asked them to look deeper inside. They immediately did so and almost instantly noticed that the issue was IP-related.
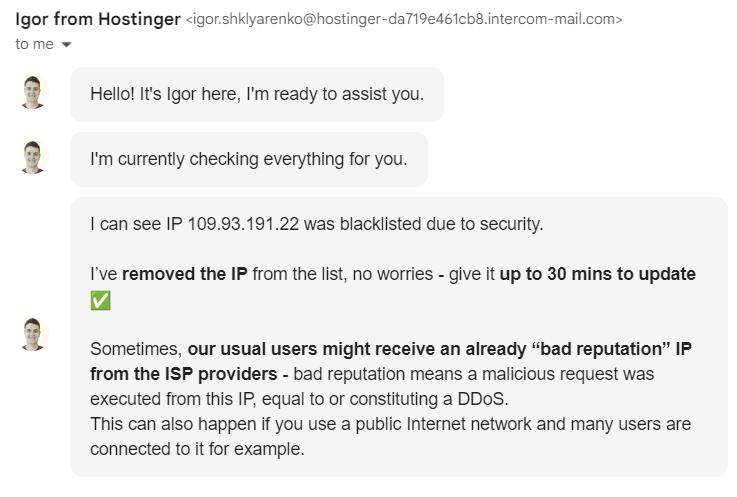
The root of this issue was based on the fact that my IP address got blacklisted by the Hostingers automated security system. As the people from the customer support service told me: “Sometimes, our usual users might receive an already “bad reputation” IP from the ISP providers – bad reputation means a malicious request was executed from this IP, equal to or constituting a DDoS. This can also happen if you use a public Internet network and many users are connected to it for example.“
This is actually pretty much accurate. I was accessing my website from the same devices (my laptop and my mobile phone), but I was accessing it from different internet providers, using Wi-Fi from shopping malls and cafes. I noticed this issue first appeared while I was on a trip abroad in Budapest.
In these types of cases, there is no other efficient way of fixing the issue than reaching out to the hosting provider customer support, noting to them how you have checked the primary steps that I’ve talked about above, and asking them to check if your IP address was maybe blacklisted. If this is the case, they should be able to fix it for you pretty fast.