A few of my junior colleagues struggled to figure out where to start with Salesforce API testing. So, I put together this simple step-by-step guide to help them, as well as you, to set up your own APEX REST API in Salesforce. I’ll also show you how to test it using Postman. By the time you finish reading this article, you’ll have a fully functional APEX REST API and know how to interact securely and efficiently, ensuring everything works smoothly before you integrate it.
APEX Code for Postman API testing
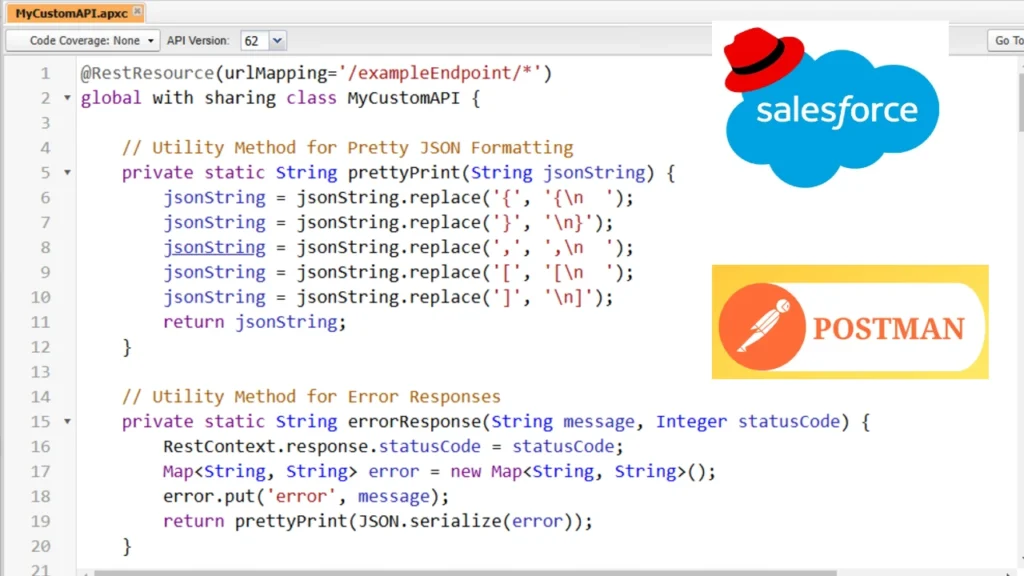
You have to set up the following APEX code in your Salesforce Developer Console:
@RestResource(urlMapping='/exampleEndpoint/*')
global with sharing class MyCustomAPI {

    // Utility Method for Pretty JSON Formatting
    private static String prettyPrint(String jsonString) {
        jsonString = jsonString.replace('{', '{\n  ');
        jsonString = jsonString.replace('}', '\n}');
        jsonString = jsonString.replace(',', ',\n  ');
        jsonString = jsonString.replace('[', '[\n  ');
        jsonString = jsonString.replace(']', '\n]');
        return jsonString;
    }

    // Utility Method for Error Responses
    private static String errorResponse(String message, Integer statusCode) {
        RestContext.response.statusCode = statusCode;
        Map<String, String> error = new Map<String, String>();
        error.put('error', message);
        return prettyPrint(JSON.serialize(error));
    }

    // REST API GET Method
    @HttpGet
    global static void getExampleDataREST() {
        RestRequest req = RestContext.request;
        RestResponse res = RestContext.response;

        String recordId = req.requestURI.substring(req.requestURI.lastIndexOf('/') + 1);

        if (String.isNotBlank(recordId)) {
            try {
                Account acc = [SELECT Id, Name FROM Account WHERE Id = :recordId LIMIT 1];
                String prettyJsonResponse = JSON.serializePretty(acc);

                res.statusCode = 200; // HTTP 200 OK
                res.addHeader('Content-Type', 'application/json');
                res.responseBody = Blob.valueOf(prettyJsonResponse);
            } catch (Exception e) {
                res.statusCode = 404; // Not Found
                res.responseBody = Blob.valueOf('{"error": "Record not found"}');
            }
            return;
        }

        res.statusCode = 400; // Bad Request
        res.responseBody = Blob.valueOf('{"error": "No specific record requested"}');
    }

    // REST API POST Method
    @HttpPost
    global static void createExampleDataREST() {
        RestRequest req = RestContext.request;
        RestResponse res = RestContext.response;

        try {
            Account acc = (Account) JSON.deserialize(req.requestBody.toString(), Account.class);

            // Validate required fields
            if (String.isBlank(acc.Name)) {
                res.statusCode = 400; // Bad Request
                res.responseBody = Blob.valueOf('{"error": "Account Name is required"}');
                return;
            }

            insert acc;

            // Create a response map
            Map<String, Object> response = new Map<String, Object>();
            response.put('Id', acc.Id);
            response.put('Name', acc.Name);

            // Pretty print JSON
            String prettyJsonResponse = JSON.serializePretty(response);

            // Set response headers and body
            res.statusCode = 201; // HTTP 201 Created
            res.addHeader('Content-Type', 'application/json');
            res.responseBody = Blob.valueOf(prettyJsonResponse);
        } catch (Exception e) {
            res.statusCode = 500; // Internal Server Error
            res.responseBody = Blob.valueOf('{"error": "Failed to create record: ' + e.getMessage() + '"}');
        }
    }

    // REST API PUT Method
    @HttpPut
    global static void updateExampleDataREST() {
        RestRequest req = RestContext.request;
        RestResponse res = RestContext.response;
        String recordId = req.requestURI.substring(req.requestURI.lastIndexOf('/') + 1);

        if (String.isNotBlank(recordId)) {
            try {
                Account existingAcc = [SELECT Id, Name FROM Account WHERE Id = :recordId LIMIT 1];
                Account updatedAcc = (Account) JSON.deserialize(req.requestBody.toString(), Account.class);

                // Validate required fields
                if (String.isBlank(updatedAcc.Name)) {
                    res.statusCode = 400; // Bad Request
                    res.responseBody = Blob.valueOf(prettyPrint(JSON.serialize(new Map<String, String>{
                        'error' => 'Account Name is required'
                    })));
                    return;
                }

                // Preserve the ID and update the record
                updatedAcc.Id = existingAcc.Id;
                update updatedAcc;

                // Create a response map
                Map<String, Object> response = new Map<String, Object>{
                    'Id' => updatedAcc.Id,
                    'Name' => updatedAcc.Name
                };

                // Use the custom prettyPrint utility for formatting
                String prettyJsonResponse = prettyPrint(JSON.serialize(response));

                res.statusCode = 200; // HTTP 200 OK
                res.addHeader('Content-Type', 'application/json');
                res.responseBody = Blob.valueOf(prettyJsonResponse);
            } catch (Exception e) {
                res.statusCode = 404; // Not Found
                res.responseBody = Blob.valueOf(prettyPrint(JSON.serialize(new Map<String, String>{
                    'error' => 'Failed to update record: ' + e.getMessage()
                })));
            }
            return;
        }

        res.statusCode = 400; // Bad Request
        res.responseBody = Blob.valueOf(prettyPrint(JSON.serialize(new Map<String, String>{
            'error' => 'No record ID provided for update'
        })));
    }

    // REST API DELETE Method
    @HttpDelete
    global static void deleteExampleDataREST() {
        RestRequest req = RestContext.request;
        RestResponse res = RestContext.response;
        String recordId = req.requestURI.substring(req.requestURI.lastIndexOf('/') + 1);

        if (String.isNotBlank(recordId)) {
            try {
                Account acc = [SELECT Id FROM Account WHERE Id = :recordId LIMIT 1];
                delete acc;

                res.statusCode = 204; // HTTP 204 No Content
                res.addHeader('Content-Type', 'application/json');
                res.responseBody = Blob.valueOf(prettyPrint(JSON.serialize(new Map<String, String>{
                    'message' => 'Record successfully deleted'
                })));
            } catch (Exception e) {
                res.statusCode = 404; // Not Found
                res.responseBody = Blob.valueOf(prettyPrint(JSON.serialize(new Map<String, String>{
                    'error' => 'Failed to delete record: ' + e.getMessage()
                })));
            }
            return;
        }

        res.statusCode = 400; // Bad Request
        res.responseBody = Blob.valueOf(prettyPrint(JSON.serialize(new Map<String, String>{
            'error' => 'No record ID provided for deletion'
        })));
    }
}
This code will allow you to dynamically update the Accounts Object record inside your Salesforce environment by using Postman requests.
How do you set up the Apex code for Salesforce?
First, you have to navigate to the Developers Console.
Then, click on File in the top left.
Inside it, click on New and select Apex Class.
You will be asked to provide a name for your Apex file.
After that, paste the Apex code I provided above into the newly created Apex file and save the changes.

Endpoints for Postman testing:
- GET: Retrieve data about a single item by using its ID number
/services/apexrest/exampleEndpoint/{id} - POST: Create a new item
/services/apexrest/exampleEndpoint- Request body:
{ "Name": "New Account" }
- Request body:
- PUT: Modify existing items name
/services/apexrest/exampleEndpoint/{id}- Request body:
{ "Name": "Updated Account Name" }
- Request body:
- DELETE: Delete an existing item
/services/apexrest/exampleEndpoint/{id}
Real example showcase
After the APEX code has been updated in the Developers Console, we will start the testing procedure. We will need 2 instances open:
- Open Postman
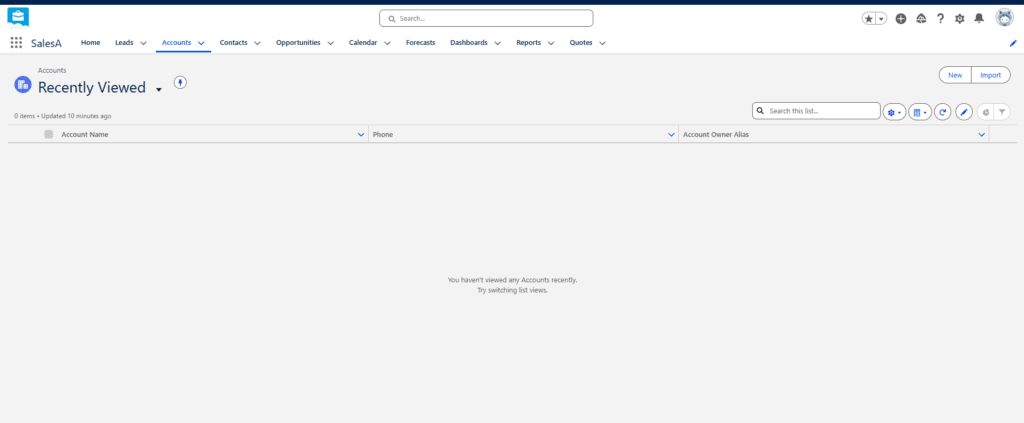
- Open Accounts Object inside of Salesforce.
Postman Request 0: Authentication
Before we make any request to our Accounts record, we should authenticate ourselves with Salesforce. I have already covered this step by implementing the SOAP method in my articles on SOAP Salesforce Authorization with Postman (no OAuth) and Automating Salesforce sessionId Retrieval in Postman for SOAP APIs. Check them out to set up the initial request.
Postman Request 1: Create an item
Request Type: POST
Path: https://fun-inspiration-5108.my.salesforce.com/services/apexrest/exampleEndpoint
Headers:
Authorization: Bearer {{sessionId}}
Body:
{ "Name": "First Account" }Modify the value of the Name key on your own. Note that you can create multiple items, but you can do that 1 by one, so no numerous items at once. 1 item per request.
Response:
{
    "Name": "First Account",
    "Id": "001KB000006hgebYAA"
}
Postman Request 2: GET the item that we have just created
We are retrieving the item that we have just created by using its ID value.
Request Type: GET
Path: https://fun-inspiration-5108.my.salesforce.com/services/apexrest/exampleEndpoint/001KB000006hiDtYAI
Headers:
Authorization: Bearer {{sessionId}}
Body: None
Response:
{
    "attributes": {
        "type": "Account",
        "url": "/services/data/v62.0/sobjects/Account/001KB000006hiDtYAI"
    },
    "Id": "001KB000006hiDtYAI",
    "Name": "First Account"
}
Check the updated item in the Accounts Object from the Salesforce side
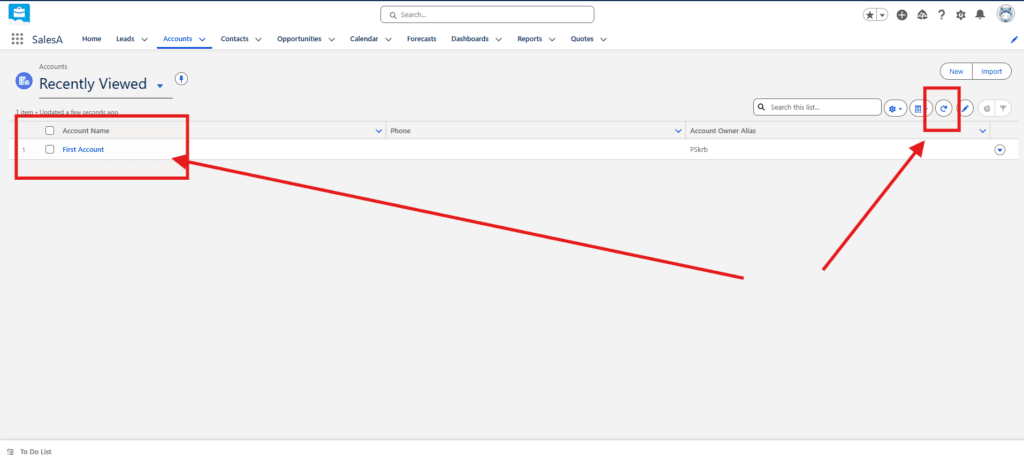
Refresh the record list, and the new item created should appear there with the same name that we had set for it in Postman.
Postman Request 3: Modify the name of the previously created item
Request Type: PUT
Path: https://fun-inspiration-5108.my.salesforce.com/services/apexrest/exampleEndpoint/001KB000006hiDtYAI
Headers:
Authorization: Bearer {{sessionId}}
Body:
{ "Name": "Updated Account Name" }Request:
{
    "Name": "Updated Account Name",
    "Id": "001KB000006hiDtYAI"
}
Expected status: 200 OK
Postman Request 4: Check the change by sending another GET request
Request Type: GET
Path: https://fun-inspiration-5108.my.salesforce.com/services/apexrest/exampleEndpoint/001KB000006hiDtYAI
Headers:
Authorization: Bearer {{sessionId}}
Body: None
Response:
{
    "attributes": {
        "type": "Account",
        "url": "/services/data/v62.0/sobjects/Account/001KB000006hiDtYAI"
    },
    "Id": "001KB000006hiDtYAI",
    "Name": "Updated Account Name"
}
Expected status: 200 OK
Check if the new change is properly applied from the Salesforce side as well
After you refresh your items list, the previously created items should appear with the new name that was just updated.
Postman Request 5: Delete the item that was previously created
Request Type: DELETE
Path: https://fun-inspiration-5108.my.salesforce.com/services/apexrest/exampleEndpoint/001KB000006hiDtYAI
Headers:
Authorization: Bearer {{sessionId}}
Body: None
Response: Empty
Expected status: 204 No Content
Postman Request 6: Check if the item was deleted
Request Type: GET
Path: https://fun-inspiration-5108.my.salesforce.com/services/apexrest/exampleEndpoint/001KB000006hiDtYAI
Headers:
Authorization: Bearer {{sessionId}}
Body: None
Response: {“error”: “Record not found”}
Expected status: 404 Not Found
Check it from the Salesforce side as well!
Finally, once again, refresh the Accounts records list, and the previously created and updated item should now be removed following the Postman Request 5.
