When I first delved into Object-Oriented Programming (OOP), the concept seemed abstract until I started building tangible projects. Today, I’ll walk you through an OOP-based implementation of a simple MP3 player that I coded using JavaScript, HTML, and CSS.
What is Object-Oriented Programming?
OOP is a programming paradigm that organizes code into objects—self-contained units that bundle data (properties) and functions (methods) together. This approach enhances code reusability, readability, and scalability. The main concepts in OOP are:
- Classes and Objects: A class is a blueprint for creating objects, defining their properties and behaviors.
- Encapsulation: Bundling data and methods that operate on the data within a single unit.
- Abstraction: Hiding complex implementation details and showing only the necessary features.
- Inheritance: Creating new classes based on existing ones.
- Polymorphism: Allowing methods to have different implementations based on the object.
Building the MP3 Player with OOP
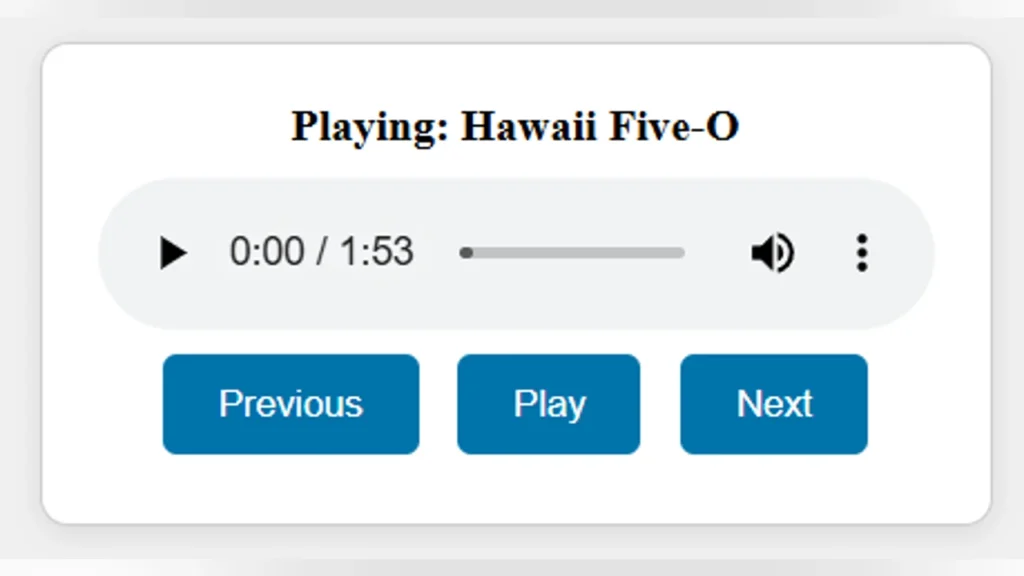
In my example, I built a basic MP3 player using a JavaScript class named MusicPlayer. This class encapsulates properties and methods related to audio control, song information, and event handling.
1. The Class Definition
class MusicPlayer {
  constructor(audioElement, songInfoElement) {
    this.audioElement = audioElement;
    this.songInfoElement = songInfoElement;
    this.songs = [
      { title: "Hawaii Five-O", src: "Hawaii Five-O.mp3" },
      { title: "Pipeline", src: "Pipeline.mp3" },
      { title: "Miserlou", src: "Miserlou.mp3" }
    ];
    this.currentSongIndex = 0;

    // Initialize event listeners
    document.getElementById("play-button").addEventListener("click", () => this.togglePlay());
    document.getElementById("prev-button").addEventListener("click", () => this.playPrevious());
    document.getElementById("next-button").addEventListener("click", () => this.playNext());

    // Load the first song
    this.loadSong();
  }
Explanation:
- Constructor: The
constructormethod initializes theaudioElement,songInfoElement, and an array of songs. It also sets the initial song index. - Properties: The
audioElementandsongInfoElementare passed in to control audio playback and display song details. - Event Listeners: They bind HTML button elements to specific methods, connecting user interactions to the class’s logic.
2. Methods for Player Functionality
loadSong() {
    const song = this.songs[this.currentSongIndex];
    this.audioElement.src = song.src;
    this.songInfoElement.textContent = `Playing: ${song.title}`;
  }

  playSong() {
    this.audioElement.play();
  }

  pauseSong() {
    this.audioElement.pause();
  }

  togglePlay() {
    if (this.audioElement.paused) {
      this.playSong();
      document.getElementById("play-button").textContent = "Pause";
    } else {
      this.pauseSong();
      document.getElementById("play-button").textContent = "Play";
    }
  }

  playNext() {
    this.currentSongIndex = (this.currentSongIndex + 1) % this.songs.length;
    this.loadSong();
    this.playSong();
  }

  playPrevious() {
    this.currentSongIndex = (this.currentSongIndex - 1 + this.songs.length) % this.songs.length;
    this.loadSong();
    this.playSong();
  }
Explanation:
- loadSong(): Sets the
audioElementto the current song’s source and updates the displayed song title. - togglePlay(): Checks if the audio is paused and toggles between play and pause.
- playNext() / playPrevious(): Adjusts
currentSongIndexto cycle through the song list and reloads the song accordingly.
Why OOP is Effective Here
By using OOP, the MusicPlayer class encapsulates all logic related to the MP3 player, making the code more modular and easier to maintain. The class structure allows for straightforward expansion, such as adding new methods for additional controls or integrating playlists.
